

Here's the DIY of installing the S2CarbonWorks R18 Heat Shield:
This item is fairly easy to install, I think it took about ~10 minutes from start to finish. It dresses up the engine bay quite nicely.
Tools Needed:
- 10mm socket & ratchet
- Flat head screwdriver
The kit comes with the heatshield & foam tape for the coil pack cover.
Step 1: *CLICK PHOTOS TO ENLARGE THEM*
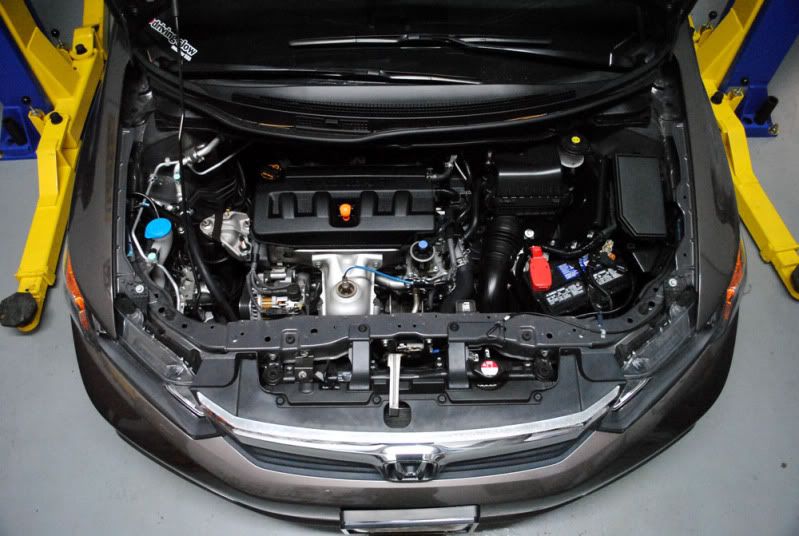
Open the hood. Allow the car to cool down for 15-20 minutes. *and remember kids, don't touch the exhaust manifold, it is very hot!
![Image]()
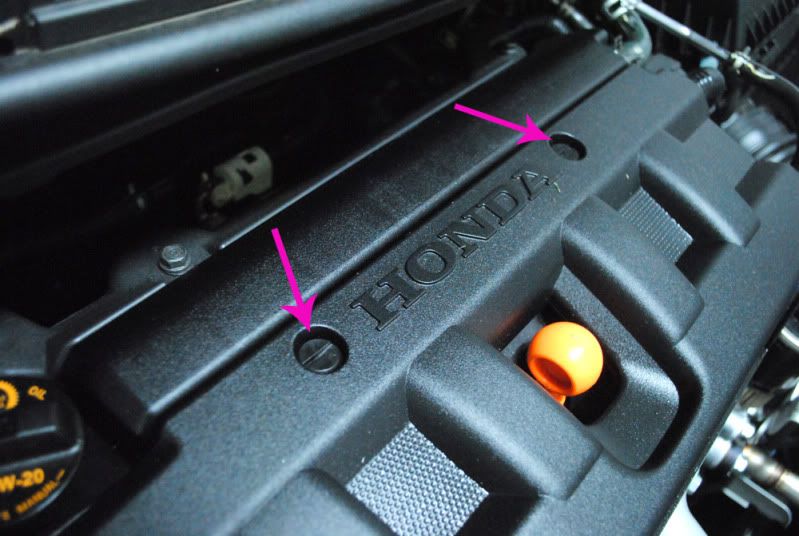
Step 2:Locate the 2 flathead screw tabs on the coil pack cover. Use the screwdriver to turn them counter-clockwise 1/4 turn to release them. Remove the coil pack cover, it just lifts off.
![Image]()
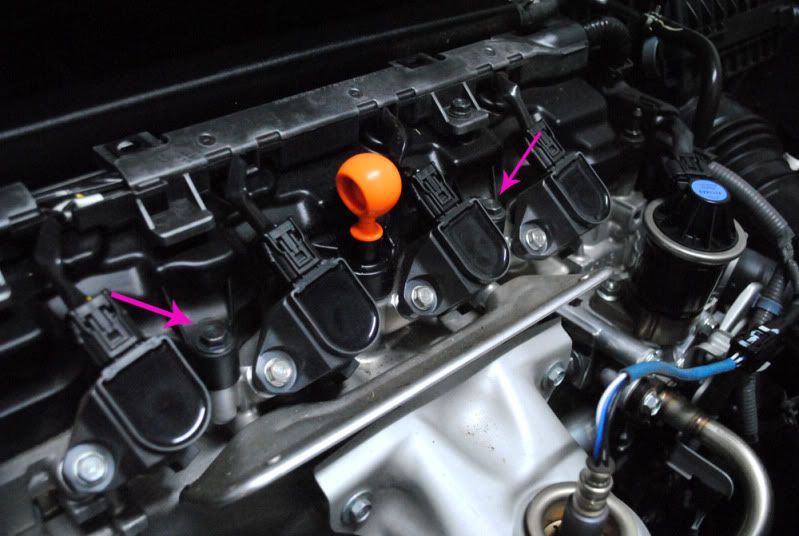
Step 3:Locate the 2 10mm bolts holding the valve cover on. They are BLACK in color. Take them out.
![Image]()
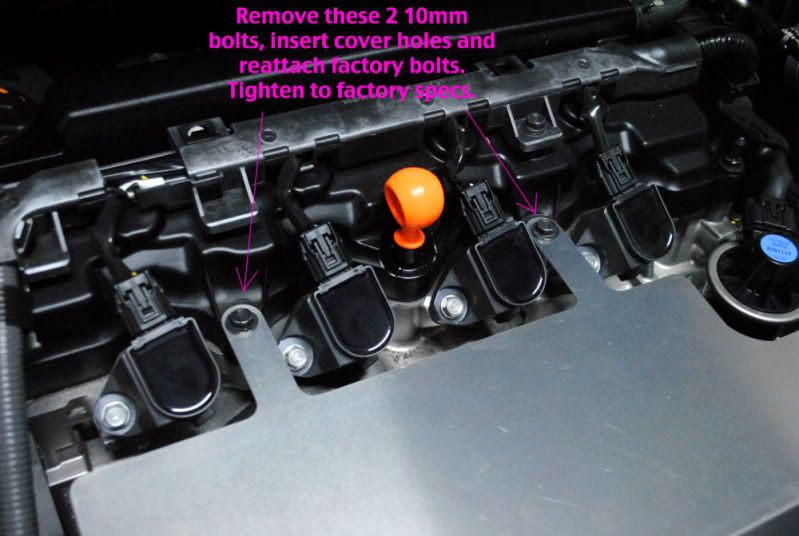
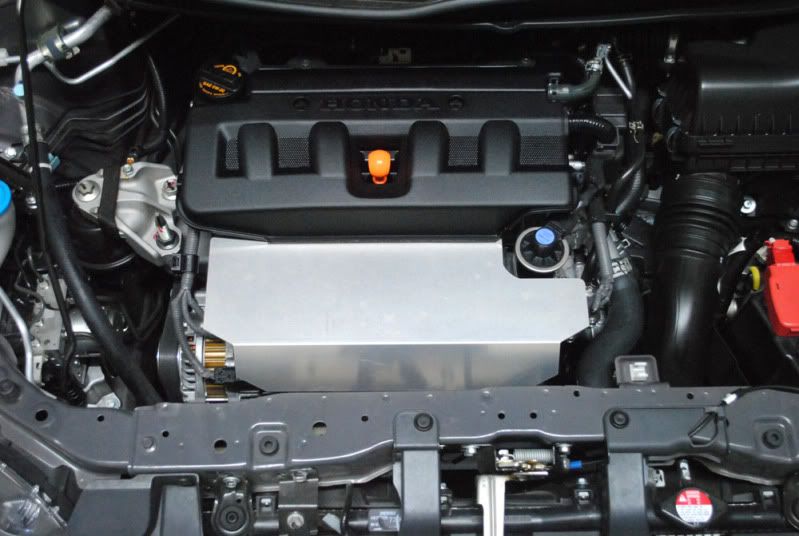
Step 4:Install the heat shield plate, reinstall the 2 10mm bolts back into the valve cover. Tighten to spec, not more (you can strip them if not careful).
![Image]()
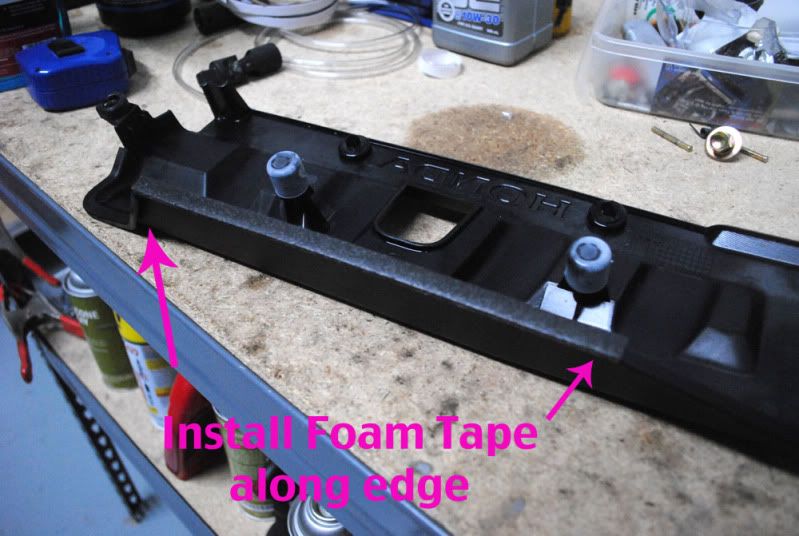
Step 5:Clean the outer lip of the coil pack cover with rubbing alcohol. Install the supplied foam tape strip along the edge like so...
![Image]()
Step 6: Reinstall the coil cover and the 2 flat head set screws. Turn them clockwise to tighten.
![Image]()
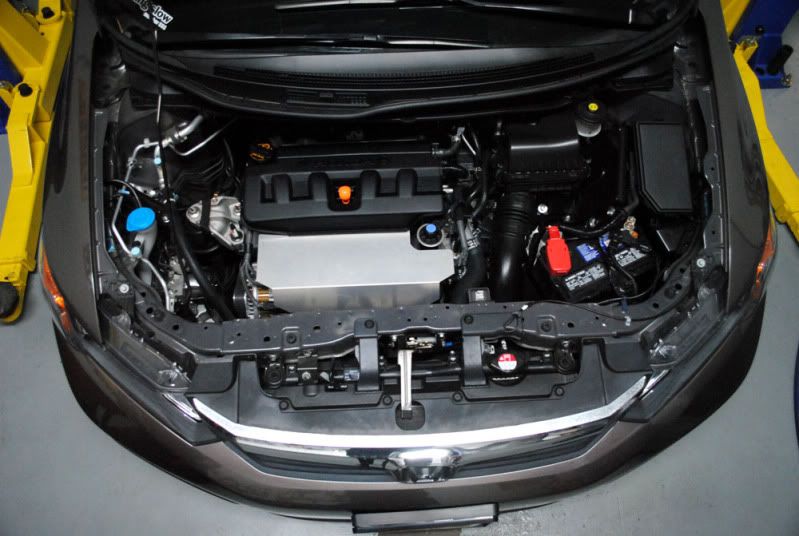
DONE!
![Image]()
Pictures courtesy of S2CarbonWorks.
They might be doing a Group BUY Discount on this heat shield soon, see the other thread for more details.
http://www.9thgencivic.com/forum/bolt-ons-all-motor/2878-r18-dress-up-cover.html#post38482
![Image]()
This item is fairly easy to install, I think it took about ~10 minutes from start to finish. It dresses up the engine bay quite nicely.
Tools Needed:
- 10mm socket & ratchet
- Flat head screwdriver
The kit comes with the heatshield & foam tape for the coil pack cover.
Step 1: *CLICK PHOTOS TO ENLARGE THEM*
Open the hood. Allow the car to cool down for 15-20 minutes. *and remember kids, don't touch the exhaust manifold, it is very hot!
Step 2:Locate the 2 flathead screw tabs on the coil pack cover. Use the screwdriver to turn them counter-clockwise 1/4 turn to release them. Remove the coil pack cover, it just lifts off.
Step 3:Locate the 2 10mm bolts holding the valve cover on. They are BLACK in color. Take them out.
Step 4:Install the heat shield plate, reinstall the 2 10mm bolts back into the valve cover. Tighten to spec, not more (you can strip them if not careful).
Step 5:Clean the outer lip of the coil pack cover with rubbing alcohol. Install the supplied foam tape strip along the edge like so...
Step 6: Reinstall the coil cover and the 2 flat head set screws. Turn them clockwise to tighten.
DONE!
Pictures courtesy of S2CarbonWorks.
They might be doing a Group BUY Discount on this heat shield soon, see the other thread for more details.
http://www.9thgencivic.com/forum/bolt-ons-all-motor/2878-r18-dress-up-cover.html#post38482


